
Sonoff (ESP8266) reprogramming – Control Mains from Anywhere
What’s a “Sonoff”? you ask
Is it sold at Ikea? No, this is not sold at Ikea:)
The Sonoff is a very small module, basically a wifi enabled wireless switch, based on the ESP8266 chip that can switch mains power. Part of it’s charm is that itis all embedded in one tiny and nice box, power supply and all and that it can fairly easy be reprogrammed. It is also really really really cheap, about $5. Cheap.
Here is some more material to catch you up to speed.
ITEAD – Product page
Daniel Eichhorn’s take on it including some very important info about the safety of the device.
🔴🔴🔴 WARNING 🔴🔴🔴
Before we get started, BEWARE, NEVER have the module connected to mains while playing with it. YOU WILL FRY.
🔴🔴🔴 WARNING 🔴🔴🔴
Cool, I like it. How do I use it?
Well, as it comes out of the box, you could use it with the app the provide, but that’s really no fun.
The alternative is of course to write your own firmware for it.
Now you are talking, what do I need to do?
There are probably a million uses for such a flexible device, but in the end, it all boils down to one thing.
The one thing that this device does is switch on and off mains power. What do you want to control? A fan? Lights? A stereo? If it’s powered you can probably use this on it.
In my case, I want to have a bunch of lights turn on as my alarm turns off and it’s nighttime. As simple as that.
This of course can be improved later, as I also need to have a physical button to control the lights, and maybe a timer to turn them off after a while, and more and more…the sky is the limit.
I have looked at what options i had of doing this, and one more advanced, more complex solution can be found here Sonoff-MQTT-OTA-Arduino .
That project, as nice as it is, did not hit a nerve with me, and I thought that maybe a simpler version would be better. (simpler of course is debatable).
And so SonoffBoilerplate was born.
SonoffBoilerplate
Because I can see myself running a number of these little devices which I like very much, I thought I’d better have a starting point so i don’t start from scratch every time I prepare another one.
The goals would be:
– over the air updates, so you don t have to take the module out for reprogramming
– easy configuration of parameters and wifi credentials
– flexible enough to be reused
– controllable through various methods, physical, mqtt, http, blynk
Getting started
Sonoff physical modifications
You will need to solder a header onto the Sonoff in order to reprogram it.
The latest, WiFi only version, of the device has an unpopulated 5 pin header onto which you need to add some pins.
Pinout
1. vcc 3v3 (this is the square pad)
2. rx
3. tx
4. gnd
5. gpio 14 (untested yet)
After you solder the header and connect a usb to serial dongle it should look like this:
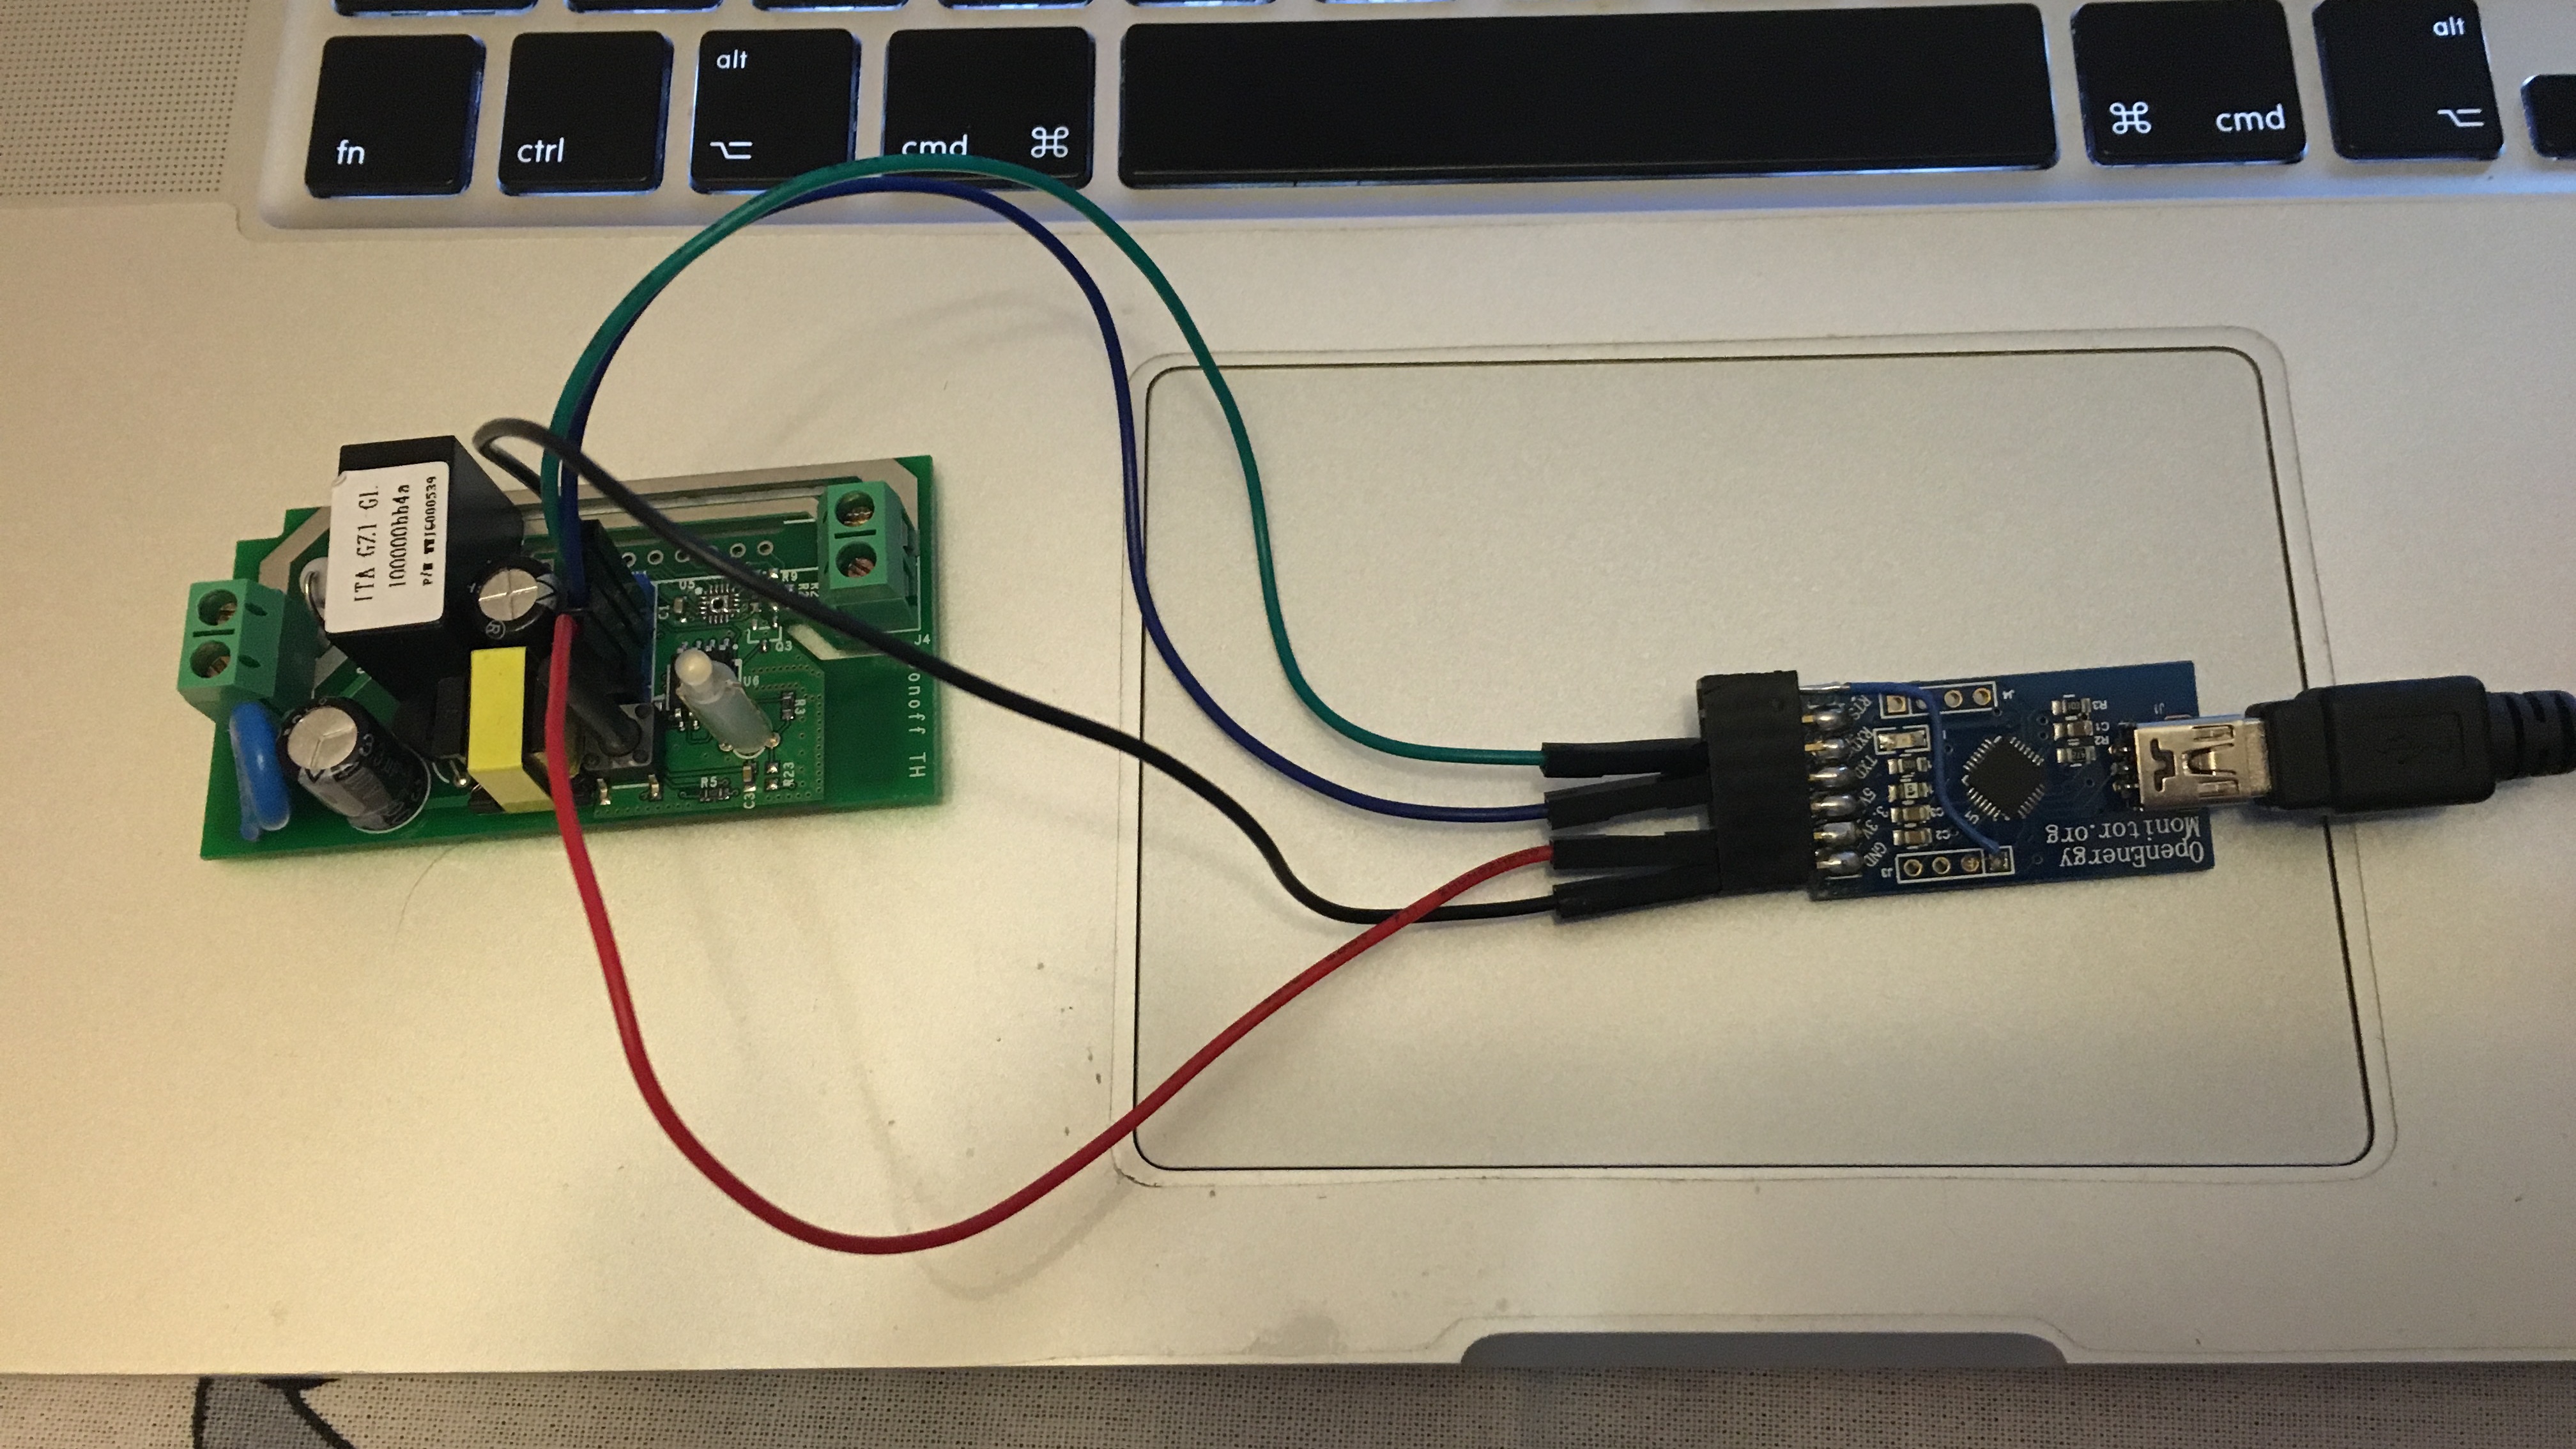
Sonoff with header soldered and usb to serial dongle attached
Firmware
First you need to have Arduino IDE with the ESP8266 core installed
You will need to download SonoffBoilerplate together with all the libraries it depends upon.
Libraries:
– WiFiManager
– Blynk
You can of course remove any bits of code you don t want or need.
Be sure to set the Flash size to 1MB in the IDE.
Look through the code, change whatever does not suit you and flash the firmware using Arduino IDE.
You should also be able to do future updates through Arduino IDE OTA so no need to be tethered to the module anymore.
Usage
After you flash it, the module should restart and the green LED will start blinking.
Slow blink means it’s trying to connect.
Fast blink means it started an Access Point and a Web Configuration Portal for you to configure your wifi credentials and any other parameters that might be needed.
The portal looks like this:

Sonoff WiFiManager configuration portal
Configure, save and it should connect to your WiFi network. The default is that the relay will be turned on on power on, the green LED should reflect the state. On for on, off for off. Simples.
You can use the button on the module to do the following:
– short press: toggle relay on/off
– 5 seconds press: reset module
– 20 seconds press: reset wifi credentials, which will restart the module in configuration mode
Now, this is the intial build of this, there are many more things to do. MQTT and HTTP are not implemented yet as I am writing this but should be soon. An external button press should also be added on the extra pin.
This should be enough to get you started with your own modifications though and hopefully lot faster than starting from scratch.
When I am done with the rest will post a part 2, maybe even 3 with it installed in place.
I hope you find it usefull, have fun and hit me up on twitter or github for any questions.
Part 2 is now up: Control with Blynk
Category: blog